Set up Microsoft Entra ID for TrueContext Corporate Single Sign-On
Microsoft Entra ID is a cloud-based identity management service that replaces Azure Active Directory. This topic describes how to set up Single Sign-On![]() A corporate login (also Single Sign-On or SSO) allows users to sign into the TrueContext Web Portal and apps by authenticating the user's login through an identity provider (IdP), such as Okta or OneLogin. Users must initiate SSO from the TrueContext Web Portal or Mobile App. (SSO
A corporate login (also Single Sign-On or SSO) allows users to sign into the TrueContext Web Portal and apps by authenticating the user's login through an identity provider (IdP), such as Okta or OneLogin. Users must initiate SSO from the TrueContext Web Portal or Mobile App. (SSO![]() A corporate login (also Single Sign-On or SSO) allows users to sign into the TrueContext Web Portal and apps by authenticating the user's login through an identity provider (IdP), such as Okta or OneLogin. Users must initiate SSO from the TrueContext Web Portal or Mobile App.) using Microsoft Entra ID.
A corporate login (also Single Sign-On or SSO) allows users to sign into the TrueContext Web Portal and apps by authenticating the user's login through an identity provider (IdP), such as Okta or OneLogin. Users must initiate SSO from the TrueContext Web Portal or Mobile App.) using Microsoft Entra ID.
Available on the Intelligent and Elite tiers:
Contents
Process to set up SSO
| Step | System | Description |
|---|---|---|
| 1 | TrueContext Web Portal |
Download the Service Provider Metadata. |
| 2 | Microsoft Entra admin center | Create a TrueContext application and upload the Service Provider metadata from the previous step. |
| 3 | Microsoft Entra admin center | Download the Identity Provider (IdP) metadata for the application that you just created. |
| 4 | TrueContext Web Portal | Enable SSO and upload the IdP metadata. |
Prerequisites
-
You must be a TrueContext Admin user to access the Team Settings in the Web Portal.
-
Check that you have access to the Microsoft Entra admin center with one of the following roles:
- Cloud Application Administrator
- Application Administrator
- Owner of the service principal
-
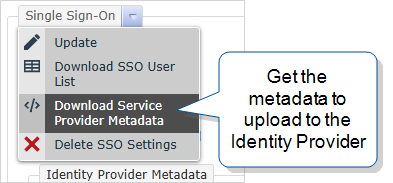
In the TrueContext Web Portal, download the Service Provider Metadata:
Team Settings > Security > Single Sign-On > Download Service Provider Metadata
Detailed steps to set up SSO
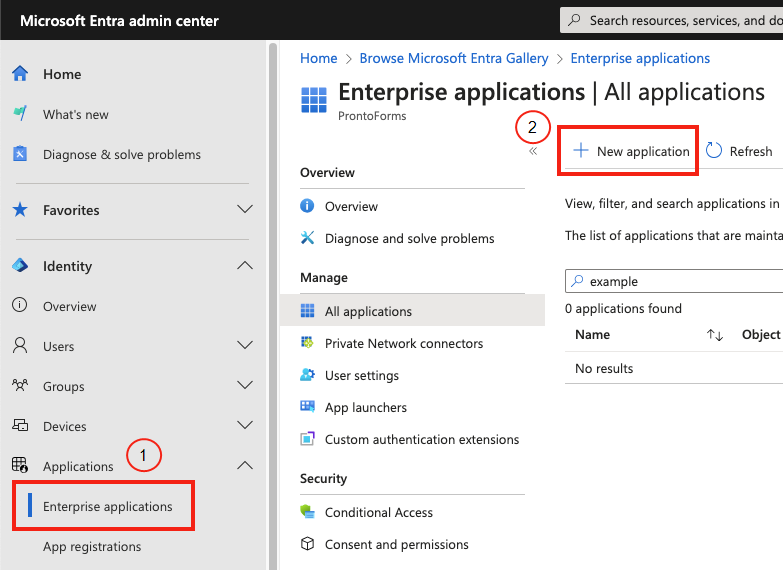
-
In the Microsoft Entra admin center, create a new TrueContext application. Select Enterprise applications > New application.
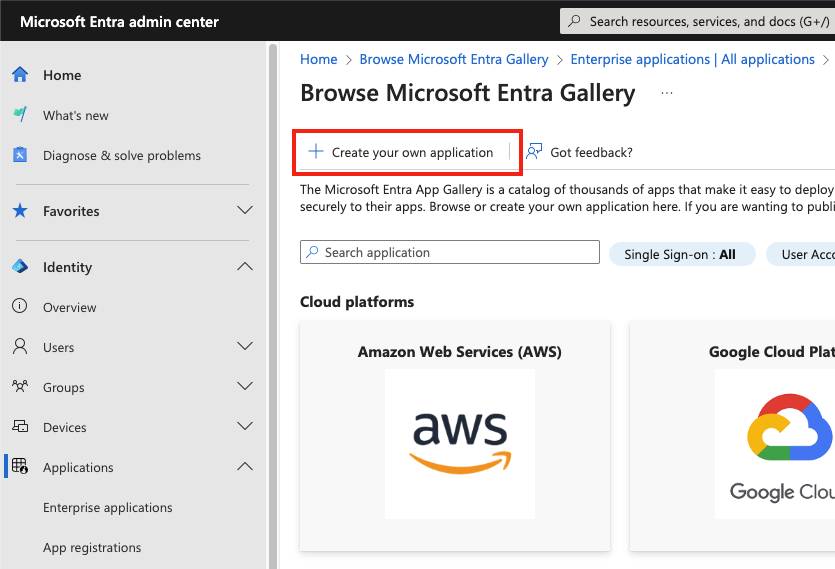
-
Select Create your own application.
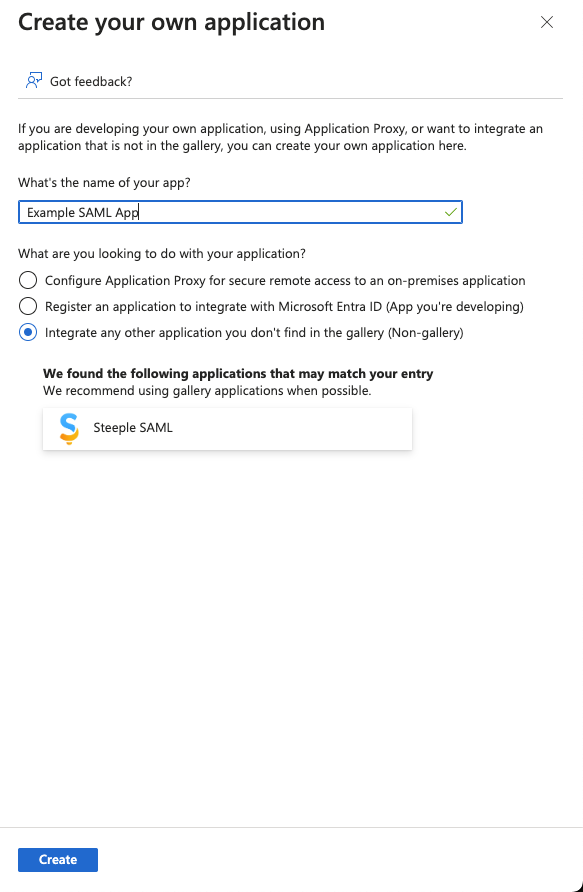
-
Create a SAML application to integrate with TrueContext. Enter a name for the new application, select the Integrate… option, and then select Create.
-
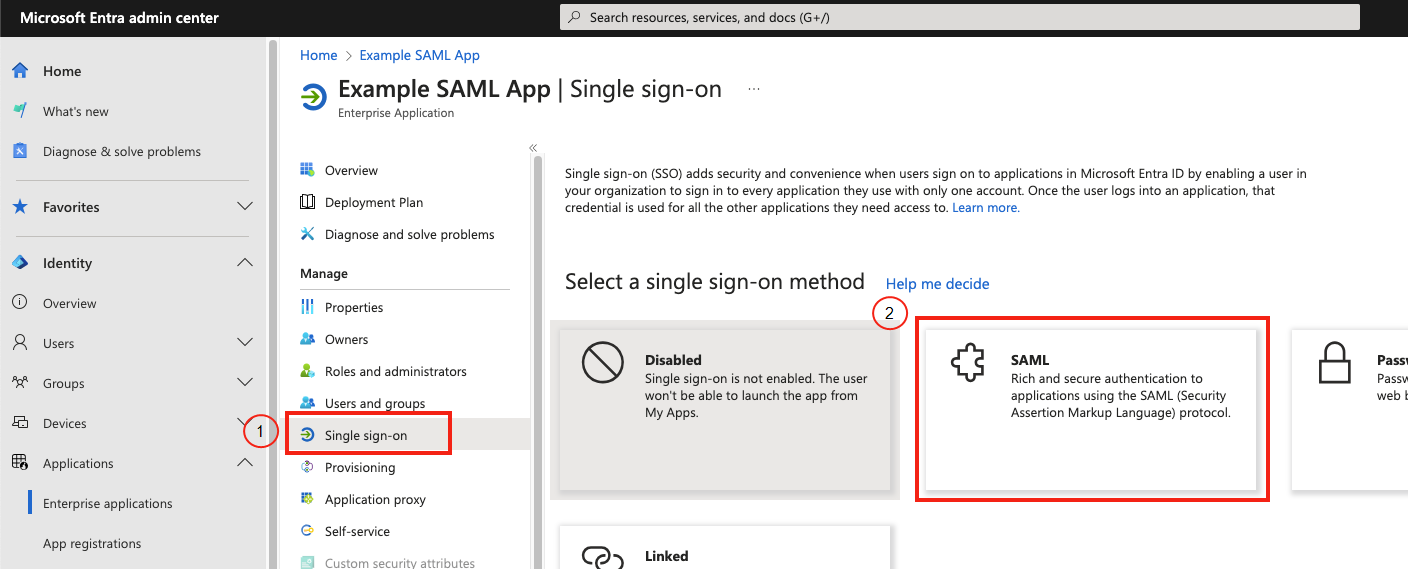
For the new application, select Single sign-on, and then select SAML as the sign-on method.
-
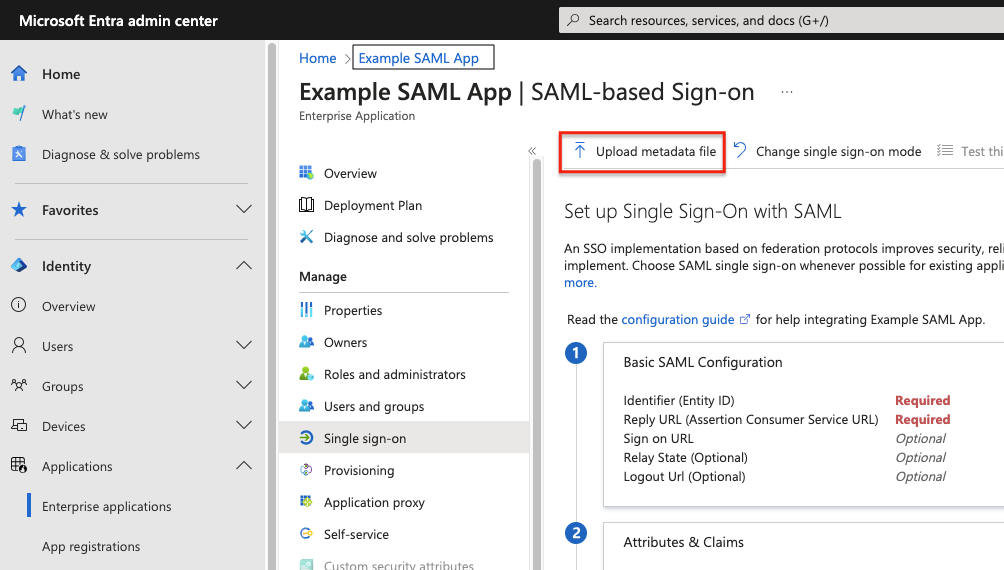
Upload the metadata file from TrueContext that you downloaded in step 3 of the prerequisites.
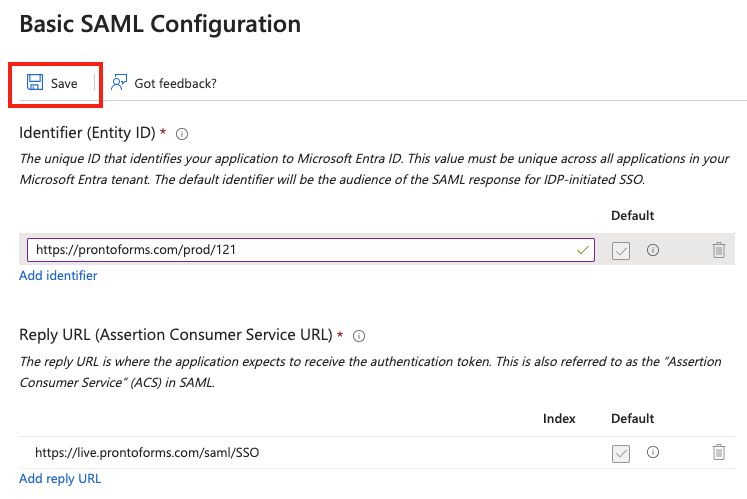
 Tip:Instead of uploading the metadata file, you can manually enter the Single sign-on values:
- Identifier… prontoforms.com/prod
- Reply URL… https://live.prontoforms.com/saml/SSO
Info:We’re now TrueContext.To support existing integrations, some items will continue to use “prontoforms” or “pf” in the domain or code.
-
Save your setup.
-
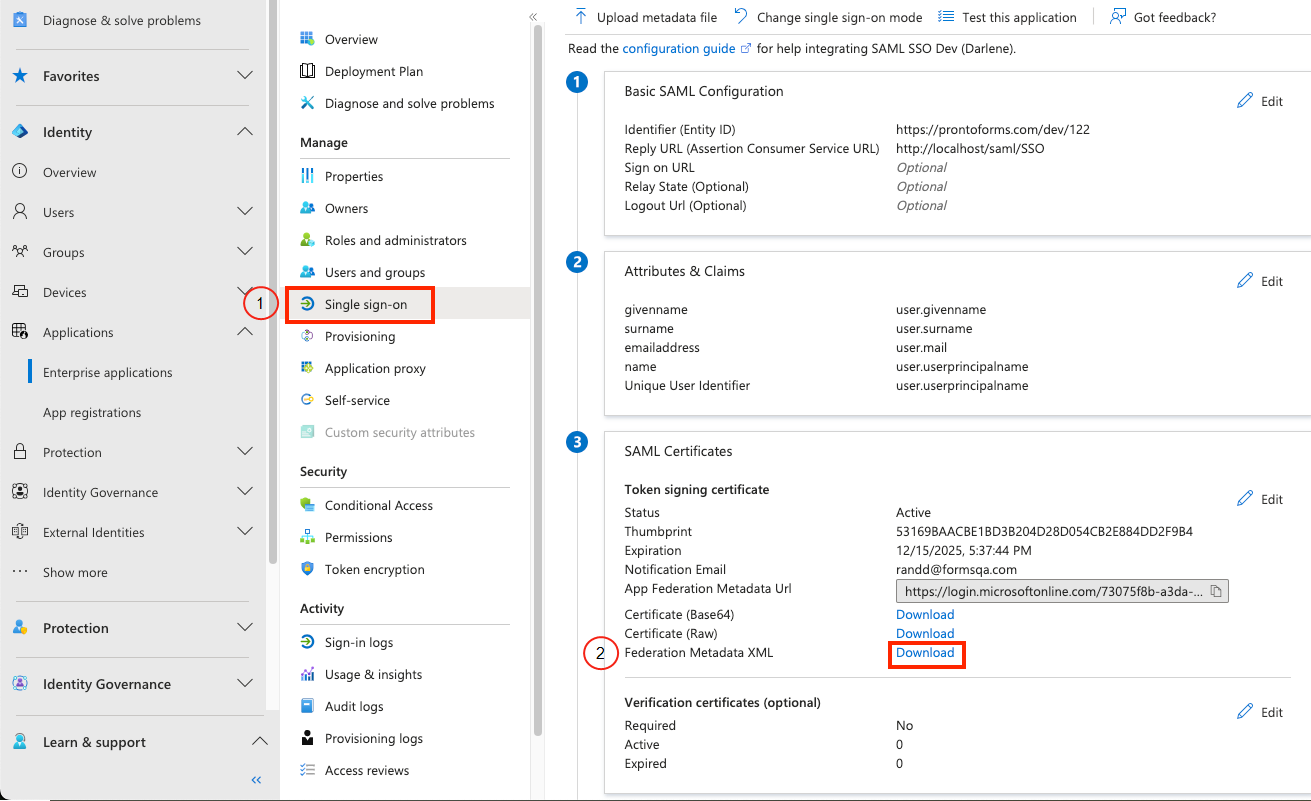
Download the Identity Provider (IdP) metadata for the application that you just created. Go to Single sign-on > Federation Metadata XML > Download.
-
Add users and groups to the application.
Note:Usernames in Microsoft Entra must match the usernames in TrueContext, unless you have User Aliases or Username Suffixes configured in TrueContext.
-
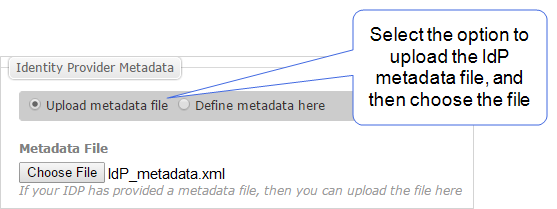
In TrueContext, enable SSO and upload the IdP metadata. Go to Team Settings > Security > Single Sign-On > Update.
Result: The system displays the SSO settings, including the option to upload and choose a metadata file.
Info:The section Set up corporate login (Single Sign-On): Single Sign-On Configuration explains the SSO settings in more detail.
-
Select Update to save your changes.
Result: SSO takes effect the next time your users sign into TrueContext.