Set Up Corporate Login (SSO) with OneLogin
With Corporate Login (Single Sign-On A corporate login (also Single Sign-On or SSO) allows users to sign into the TrueContext Web Portal and apps by authenticating the user's login through an identity provider (IdP), such as Okta or OneLogin. Users must initiate SSO from the TrueContext Web Portal or Mobile App., or SSO A corporate login (also Single Sign-On or SSO) allows users to sign into the TrueContext Web Portal and apps by authenticating the user's login through an identity provider (IdP), such as Okta or OneLogin. Users must initiate SSO from the TrueContext Web Portal or Mobile App.), your users can sign in to TrueContext with the credentials they use for OneLogin. To set it up, you configure SSO in two places: in TrueContext, and in your identity provider. This topic covers the OneLogin side. For the TrueContext side, refer to Set up corporate login (Single Sign-On).
Available on the Intelligent and Elite tiers:
Note:If you change the SSO settings of your OneLogin app after setup, download the OneLogin metadata file again and upload it to your team’s Single Sign-On settings in the Web Portal. This keeps authentication in sync between TrueContext and OneLogin.
Add the TrueContext app in OneLogin
-
Sign in to OneLogin as an administrator.
-
Select Administration.
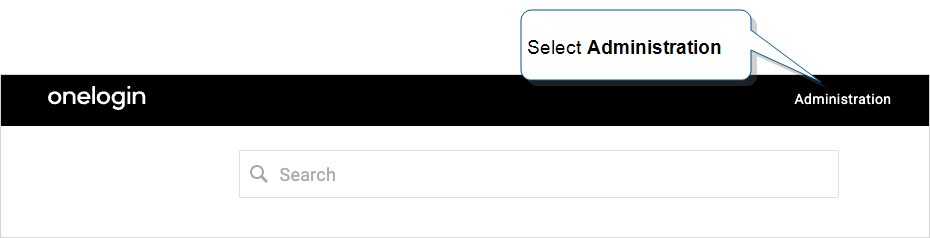
Result: The OneLogin administrator dashboard opens.
-
Go to Applications > Applications.
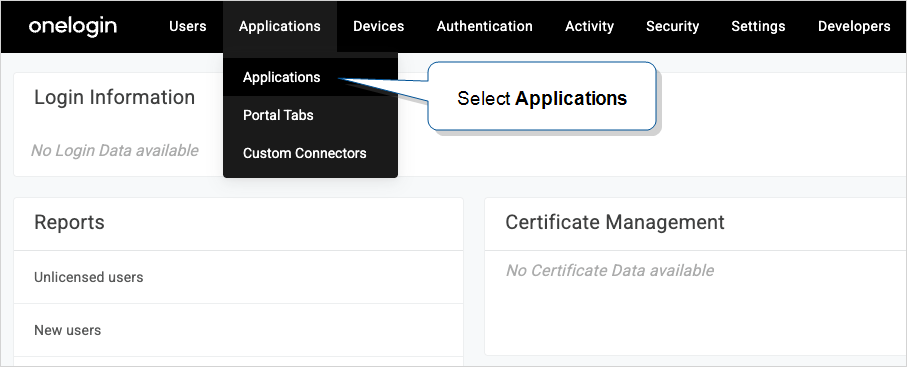
Result: The Applications page opens and lists your company’s apps.
-
Select Add App.

Result: The Find Applications page opens.
-
Several connectors have similar names. Search for SAML Custom Connector, and then select SAML Custom Connector (Advanced).
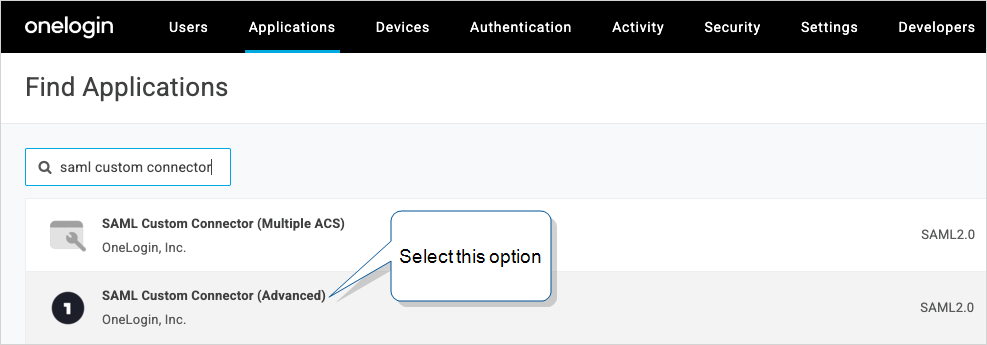
Result: The Add SAML Custom Connector (Advanced) page opens.
-
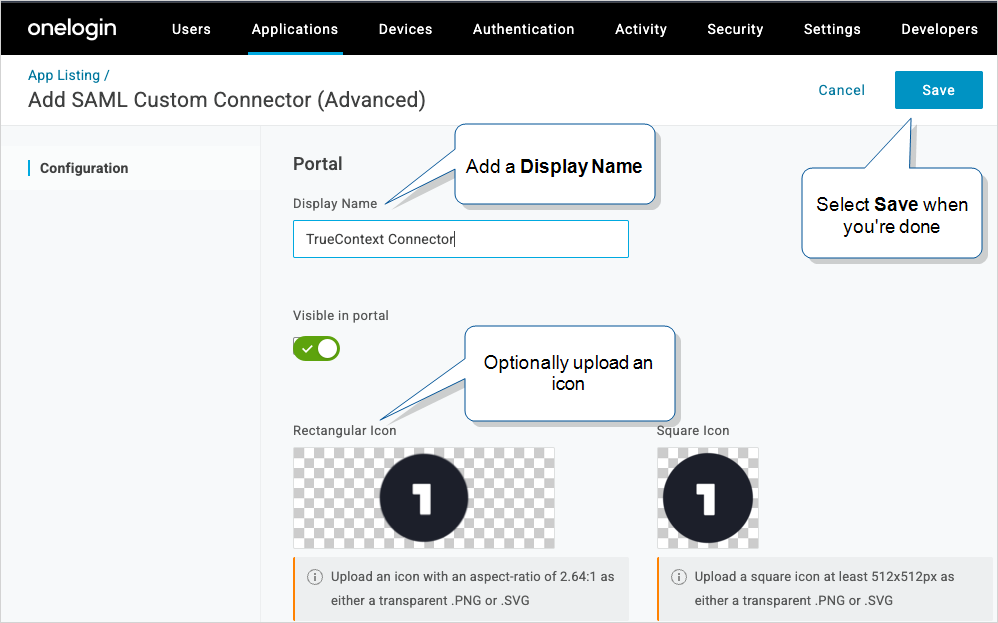
In Display Name, enter a name that tells your users the app signs them in to TrueContext. Optionally, upload a Rectangular Icon and a Square Icon.
-
Select Save.
Result: The app’s settings open, with Info, Configuration, SSO, Users, and other sections in the left pane.
-
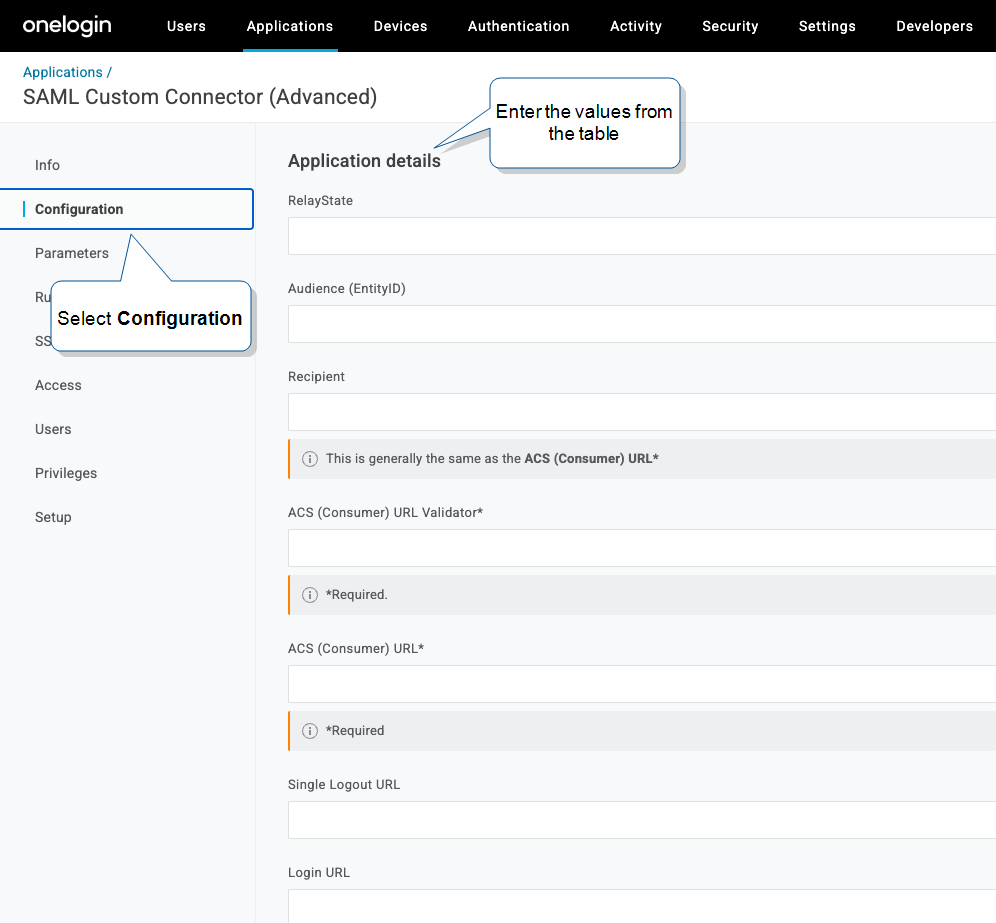
In the left pane, select Configuration, and then enter the values from the following table. OneLogin doesn’t accept a metadata file upload, so enter these values manually.
The Audience (EntityID) value is the
entityIDattribute on themd:EntityDescriptorelement in your TrueContext service provider metadata file. Copy it exactly. To get the file, follow the steps in Get Service Provider Metadata from TrueContext.If you plan to launch TrueContext directly from OneLogin, use the values in the Launch from OneLogin column. For more information, refer to Launching Corporate Login directly from an Identity Provider.
Field Value Launch from OneLogin RelayState Leave blank Leave blank Audience (EntityID) The entityIDvalue from your service provider metadata fileThe entityIDvalue from your service provider metadata fileRecipient https://live.prontoforms.com/saml/SSOhttps://live.prontoforms.com/saml/SSOACS (Consumer) URL Validator ^https:\/\/live\.prontoforms\.com\/saml\/SSO$^https:\/\/live\.prontoforms\.com\/saml\/SSO$ACS (Consumer) URL https://live.prontoforms.com/saml/SSOhttps://live.prontoforms.com/saml/SSOLogin URL Leave blank https://live.prontoforms.com/security/login/saml?domain=<SSO team domain>In the Login URL, replace
<SSO team domain>with your team’s Team Domain. For more information, refer to Team Domain.Note:TrueContext doesn’t support single logout. When users sign out of OneLogin, they stay signed in to TrueContext, so leave Single Logout URL blank.
Info:We’re now TrueContext.To support existing integrations, some items will continue to use “prontoforms” or “pf” in the domain or code.
-
Select Save.
Tip:You don’t need to change the Parameters settings. Their default configuration is correct for TrueContext.
-
In the left pane, select SSO.
-
To download the OneLogin metadata file that TrueContext needs, select More Actions > SAML Metadata.
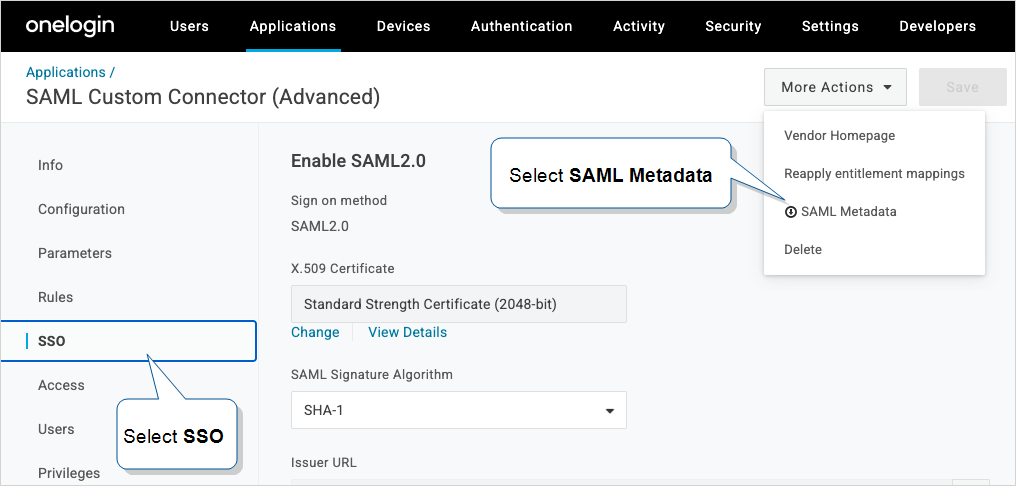
Result: OneLogin downloads the metadata file.
-
In the left pane, select Users, and then add the users who sign in to TrueContext with Corporate Login.
-
Save the app.
-
In the Web Portal, upload the OneLogin metadata file in the Metadata File field of your team’s Single Sign-On settings. For more information, refer to Identity Provider Metadata.
Tip:To test the OneLogin app, sign out of OneLogin, and then sign in to TrueContext with Corporate Login. For more information on the sign-in steps, refer to Log in Using Corporate Login/Single Sign-On.